I've posted before about how I've been in a slump and what I've tried to do about it. First, I addressed the monotony of our menu plans by cleaning out my recipe binders and planning on trying the untested recipes in those binders (that was part 1). Then I challenged myself to try new produce which produced a super yummy soup. Next I picked up a new appliance to help me with food prep (and I love my food processor). Now I have to come to terms with the fact that making nearly all of our food from scratch takes planning.
I have friends that tell me, "Oh, I could never spend that much time in the kitchen!" But, I've come to realize that it doesn't have to take 4-5 hours in the kitchen every day to make food from scratch. It takes planning. A great part of the slump I've been in, is that I haven't been planning ahead enough. If I don't take time to throw a chicken in the crockpot, then I won't have chicken ready to put in a recipe. If I don't take the time to make yogurt, then I won't have smoothies or granola parfaits. It's the same with beans and rice and roasts. None of it takes a lot of time, it takes planning.
This week's goal (and why didn't I come up with this 2 months ago?) is to plan out when I'm doing certain tasks, so I will always have the right food for whatever recipe I want to try. Ultimately, I would like to spend 20-30 minutes in the morning while I'm cooking breakfast to get a bigger project going. I'm sure that my original plan will need to be tweeked, but here's what I've got so far.
Sunday-alternate weeks either making loaves of whole wheat bread or dinner rolls/buns for sandwiches-leave out what we'll eat on Monday and freeze the rest
Monday-make big batches of beans in the crockpot (each week a different kind depending on the menu: great Northern, pinto, red, black)-while cooking dinner, divide beans up into meal-sized portions freezing what won't be eaten in the next day or two
Tuesday-crockpot chicken or roast, occasionally a ham or turkey in the oven (probably chicken twice a month and then one of the others on the off weeks)-while cooking dinner, debone the chicken
Wednesday-use carcass from chicken, turkey or bones from roast (or soup bones when we get our beef this next spring) to make broth in the crockpot-while cooking dinner, strain the broth and put in jars
Thursday-make a half gallon of yogurt (one quart plain to be used as a sour cream replacement and one quart of vanilla)
Friday-make 2 or 3 batches of baked brown rice to be used in other recipes. This is the one that might take more time than the others. It only takes a few minutes to get the rice in the oven, but it bakes for an hour. Someone needs to be there to take the rice out of the oven and start a second batch. Right now, since I'm at home all day it wouldn't be a big deal. However, if I have things to do that take me from the house, this one might be hard to pull off. It could probably be done in the evening rather easily though-make one batch while cooking dinner and another before bed. I'll think on that one.
I skipped Saturday because we're usually running around doing errands and activities. Saturday evening is typically my meal planning day. I'm hoping to work my menu around my prep schedule-like no chicken until Wednesday or after. Once I get 2-3 weeks into it, I'll have a better idea how long the food will last-will I still have a little yogurt left when I start a new batch or will we have been out for 2 days-that kind of thing.
What do you think? Is it doable? Do you have a schedule for your food prep?
Tuesday, December 13, 2011
Soaking-An Update
Last week, my baby step was to try my hand at soaking grains. Of course we all know that while I have good intentions, my follow through lacks on occasion (especially given the super busy time of year). I did do a bunch of reading on the reason behind soaking grains and I found a couple recipes that I wanted to try.
Last night I set to work getting my prep work done for soaked whole wheat pancakes and soaked whole wheat bread. For the pancakes I used this recipe from Kitchen Stewardship. I was a little skeptical this morning when I thought the concoction smelled funny, but they tasted awesome. This recipe made 21 pancakes approximately 4" across. Next time I will make mini pancakes and let the kids dip (I think they eat more when dipping than forking). Each of the kids ate 2 (and Little Man ate 4), but there were still 7 left to freeze for a morning when we're rushed. Gotta love that.
I also made whole wheat bread. I had picked out another Kitchen Stewardship recipe to try, but abandoned that idea last night in favor of using my own whole wheat bread recipe. I used the principles that Katie (from Kitchen Stewardship) laid out when making her own bread and applied them to my recipe. Basically, add all your wet ingredients (making sure that there is a somewhat acidic liquid) to the flour and then add yeast and salt the next day. I used 1/4 cup lemon juice as part of my warm water and used 6 cups of flour.
This morning, I wondered how I was going to get the yeast incorporated into the bread and activated since my kitchen was a cool 61 degrees. I activated the yeast in a 1/4 cup of warm water and dumped it on top of the pile of goopy, soaked dough with the salt. I mixed it in as well as I could (which didn't seem to be near enough). Once again, it was covered and I placed it on top of my stove with the oven preheating-I hoped that the stove top would get warm enough that the dough would rise. An hour later, the dough had risen some, but not much. I was about to consider the whole thing a failure and dump the bowl. I decided that since I'd already used 6 cups of flour, another cup wouldn't be that more to waste. I dumped the dough out on my counter and kneaded another 3/4 cup of flour into the dough, placed the dough in bread pans, covered and waited for the second rise-again on the stove top. The rise was much better this time. I let it rise for an hour before baking and it came out of the oven looking like any other loaf of bread I've baked. At this point I was getting a bit more enthusiastic.
Once cool, I cut a mini loaf for the kids' peanut butter and honey sandwiches. I did thin slices (think cocktail bread) and it didn't crumb very much at all. The crust was tender and the bread was soft, but not doughy. The taste is a tad on the sweet side, which was fine for pb & h, but I'll probably want to measure the molasses next time I make a loaf-this time I just eyeballed it and probably got a little too much.
Overall, I've been impressed with my soaking efforts. Assuming the mini pancakes turn out as good as the larger ones (and I can't see why they wouldn't), this will be make go-to pancake recipe. I'll tinker with the sweetener in the bread (like actually measure) and see if I still like the bread as well, but I think soaking helped the texture of the bread and made it better for sandwiches. If I find this to be the case, it will be my top bread recipe.
I didn't get around to making my steel cut oats. Maybe that will be breakfast tomorrow-we'll see.
Thursday, December 8, 2011
Hamburger Stroganoff
In an attempt to get out of my some 'ole recipe slump, I've started going through my recipe binders and few remaining cookbooks (in a big de-clutter last year, most didn't make the cut). Several years ago, my mother-in-law made a family cookbook for each family for Christmas. This recipe was submitted by Hubby's Aunt Marlene. It looked good and I thought Little Man might like it-he's going through quite the picky phase right now.
Anyway, it was ready in a jiffy and the kids liked it. Little Man ate most of his serving. I thought it was good, but next time I'll add cheddar cheese. Cheese makes everything better.
1/2 cup onion, finely chopped
1 clove garlic, minced (again, I'm a jar girl)
4 oz. mushrooms, chopped (the original recipe called for a can, but I used fresh)
2 Tbsp. parsley flakes
1 pound ground beef
1/4 cup butter
1/4 cup flour
1 tsp. salt
1/4 tsp. pepper
2 cups milk
1 cup sour cream
12 oz. egg noodles, cooked and drained
In a large saucepan or small stock pot, heat water for cooking the noodles. When boiling add noodles and a little salt. In a skillet, brown the ground beef with the onion, garlic, mushrooms and parsley. When the onion is soft and the beef thoroughly cooked, dump it into a colander to drain (or however you drain meat, but empty the pan). Leaving the pan on medium high heat, melt the butter, then add the flour, salt and pepper. Whisk together and allow to brown slightly. Add milk slowly and whisk in to incorporate, continue whisking to get rid of any lumps. When thickened, add the sour cream and stir it in. Then add the meat mixture back in. Stir together and heat through. This is where I'm going to add a cup or so of cheddar cheese next time. Serve over cooked and drained egg noodles. I dumped my sauce over the noodles in the stockpot and mixed them that way. I just have visions of noodles all over the table as my kids try to stir it together on their plates. That might just be me though. :)
Note: The original recipe called for a can of cream of mushroom soup, but since I don't use that, I just incorporated making my own soup into the directions for the meal.
Wednesday, December 7, 2011
Rockin' good Potato and Leek Soup
A couple weeks ago, my "baby step" was to try new produce. Leeks were at the top of my list because it seems that all of the cool cooking shows or fancy food magazines have recipes using leeks. And we all know that I'm secretly striving to be like Paula Deen. NOT! I really just think they are cool looking and wondered what they tasted like (and if I could get my family to try them).
My organic leeks arrived last Friday in my Azure Standard order, and due to some unforeseen activities, I didn't get to make my soup until last night (Tuesday). I can't believe I waited so long. It was awesome (like both of my kids ate 4 bowls awesome)!
Granted, in the past couple of weeks I've read about 40 different recipes for potato and leek soup and similar variations. I didn't find one specifically that I thought would be better than others, but I saw definite elements in some that I knew I would love. Last night when I started cooking, I started throwing things together and ended up with a masterpiece. It would be nice to have a picture of this masterpiece, but my camera is on its last leg and isn't taking very good pictures at all. You'll just have to trust me.
2 tablespoons bacon grease (oil or butter would work, but the bacon adds flavor)
2 leeks, sliced/rings separated, soaked and spun dry
1/2 an onion, finely chopped
2 cloves garlic, minced (I still do the jar kind.)
8 cups chicken broth, divided
6 Russet potatoes, peeled and diced
2 carrots, peeled and cut in coins
1-2 stalks celery, chopped
salt and pepper to taste
8 oz. cream cheese (optional)
In a large skillet (I used a 10 inch cast iron and it was on the smallish side), saute the leeks, onion and garlic in bacon grease until softened. Add 1 cup of chicken broth and simmer until completely soft. Meanwhile boil the potatoes, carrots, and celery in the remaining chicken broth until potatoes are cooked through, but not mush. Add salt and pepper to taste.
*Puree the leak mixture and cream cheese adding a little broth from the potatoes if necessary to thin (I used my new food processor). Add the puree to the pot of potatoes and stir to thoroughly incorporate the puree. Heat through.
If you desire a more blended soup, you can scoop out some of the chunks and run them through the food processor and return it back to the pot. Or, for a completely smooth soup, you can use a stick blender and blend the soup in the pot. I chose to blend some, but leave lots of chunks (I thought the pureed orange of the carrot might make the coloring of the soup unappetizing.).
*I added the cream cheese to the main pot after incorporating the puree and it didn't melt completely. It tasted fine but had tiny white pieces throughout. I'm thinking that pureeing it along with the leeks will melt it completely and eliminate that.
Last night we topped our soup with shredded co-jack cheese, but today I had it plain and it was equally yummy without it. I can imagine that adding crumbled bacon would also be nice.
Link up at Penniless Parenting's Hearth and Soul Blog Hop.
Week 47: Soaking Grains
As a person who reads many food blogs, I find many things that are similar-less or no processed foods, more fruits and veggies (organic if possible), high quality meat-not conventional, etc. Another thing I read about frequently is soaking grains. The basic idea is that soaking the grain breaks down the proteins in it aiding in digestion.
So, this week, I'm going to take a stab at that. I've got some steel cut oats that are looking for purpose. Also I think I'll try it with a loaf of bread and see how that turns out.
I've been toying with this for a while, but my main hold up has been that soaking takes thinking ahead--which, admittedly, I haven't been very good at lately. I'm trying to get back on track, so this might be one way to prod myself to do that "thinking ahead" stuff. :)
Tuesday, November 29, 2011
Week 46: Buy quality kitchen appliances
It isn't a big secret that I like to save money. Sometimes I'm not very good at melding my desire to eat better food and still save money, but I'm working on it. Since I make our meals from scratch and cook three full meals and at least one or two snacks each day, it is safe to say that I spend A LOT of time in the kitchen (or near it).
Over the past several years, our income has dropped about $10,000 over what it once was. While we're in no way impoverished, time are tougher and the budget is tighter. That generally means that when something breaks, I seriously debate about whether to replace the item or not. In terms of kitchen appliances, the decision is usually made not to replace something. In the past two years, I've lost my bread maker, hand mixer, toaster, hand blender/food chopper and various other fluffy items that aren't necessities, but are nice to have. Luckily Hubby's parents gave me a stand mixer for Christmas last year and that has been wonderful to have. But, there are still other wants...
Back in the summer (week 26 to be exact) Hubby and I decided that we would purchase used if possible to save money and be "greener." To keep in the spirit of that "baby step," I've been periodically checking out Freecycle and Craigslist to see if anything fabulous popped up. Unfortunately most of the appliances that were listed weren't really things that I thought we needed and/or they were still pretty expensive. No big deal, I'd been getting along just fine without them anyway.
In the past month or so, I've been in a funk. I've sort of lost the energy to stick with some of the changes I've made. I still have the desire, but there has been a definite lack of follow through on some things, like meal planning, staying under budget, eating out--hanging head in shame. :(
After a lot of thought on why this was, I came to a conclusion. With Hubby working a second job for the past three months, there just isn't the support there at night. Not that he's not supportive, but there's alot to be said for adding a second set of hands to help with homework, run errands, keep Little Man busy, etc. while I'm in the kitchen. No extra hands mean I'm doing it all and I run out of steam long before my next day's meal prep gets done and there is no time for blogging or searching for new recipes during nap time because I'm doing laundry, sweeping floors, or trying to get dinner prep done before the kids come home from school needing help with homework, etc.
OK, so now I identified the problem, but what could I do to solve it? I decided that adding a couple quality kitchen appliances to speed the prep process along would be money well spent. Coincidentally, I came across the Kohl's Black Friday ad and saw that they had a Cuisinart Food Processor at a crazy markdown. That, coupled with $50 that I had received as an early Christmas gift and a 15% off card, I paid a little less than $5 out of pocket for an awesome food processor. I've had it 5 days and I've already used every feature on it. I've used it to make biscuits (within 10 minutes of arriving home with it! LOL), waffles, shredded veggies on a salad and this morning I used it for cinnamon roll dough-delish!
Hopefully, this new addition to my kitchen will save me time and help me be more efficient. I'm feeling a little less funk-ish. We've tried several new recipes in the past couple weeks, all of which the family thought were yummy. That's a plus. I'm back to planning and using cash, so hopefully that will keep the budget in check. I've made a few concessions though for my sanity. I have purchased a few convenience items (bag of fries and popcorn chicken and a couple take and bake pizzas). I know that these are certainly not healthy choices, but if I'm hitting McDonald's on a crazy night, it is certainly no healthier. We'll save these things for those on the go nights and save money by not eating out. One day, I hope to have all of this mastered with several homemade options in the freezer to just pop in the oven. But, until that day comes, I'm doing what I can.
My second, and notably the biggest, concession is that I've allowed the girls to eat school lunch. This was a huge hurdle for me to overcome, but when lunches came home day after day uneaten, I decided to give this one up. The girls liked the food I sent and most often ate it every day as soon as they got home from school (or occasionally on the way home), but they got teased at school because their food was different so they would eat only the food they thought would be acceptable to their peers and leave the rest inside their lunchboxes so no one would see it. :(
On the higher side, our school is working hard to make the lunches healthier. Salad bar is offered every day with a variety of fresh fruits and veggies. They make much of their bread items from scratch-adding whole wheat (not solely, but some is better than none). They serve bone-in chicken instead of processed patties. I appreciate the effort being made and if I could get them to ditch the canned goods, I'd probably be completely ok with it (but beggars can't be choosers it seems!). Now, the downside... I've heard that they might ditch some of the healthy measures they've taken because the general population of kids won't eat the healthier foods. Ugh! We'll see how that goes!
I've rambled enough for now. Hopefully I can get a minute to post my menu plan for this week and include links for some of our new dishes. Have a great day!
Monday, November 28, 2011
Week 45: Try new "in season" produce
I like to think that my family eats a pretty wide variety of foods. I plan meals that use a variety of ingredients and from different cultures. You would think that by now, before I pat myself on the back, I should think again. Last Sunday I was walking through the produce section of our local grocery store and could point out at least 10 (and probably more) foods that I've never tried, much less prepared for a family meal. Ahhh, a new goal forming! We will try at least one new food each week for the rest of the year. Last weeks (if you didn't realize, I'm behind a week) new veggie was turnips. Hubby brought a few home from his second job and peeled them and ate them raw. Little Man and I didn't care for them, but Baby Girl loved them and wanted more. Big Girl was undecided-she ate the piece she was given, but didn't want more, so who knows on that one. I think in my next menu plan I will try to find a different preparation to see if a can win over the non-lovers (myself included).
The new veggie for this week is leeks. I've always considered leeks to be a fancier food. We'll see. I'm going to make a batch of potato and leek soup this weekend. It's not the focus of any meal-so if it's terrible, we'll still have other food! :)
If you have a great recipe using either turnips or leeks, I'd love to hear it.
Other possibilities for the rest of the year are spaghetti squash, acorn squash, various types of potatoes, parsnips and fruits like persimmons, papaya, etc. I don't necessarily know if the fruits are in season, but they have been on sale in this particular store lately, so I might try those as well.
I'll try to keep everyone updated as to what we're trying and what the verdict is!
Monday, November 14, 2011
Apple Zucchini Muffins
 I am a week and a half into my 60 pounds of apples from Azure Standard and I'm sort of tiring of apples. Don't get me wrong, I love apples, but I'm tired of the same applesauce, apple butter, dried apples, apples for eating... you get the idea.
I thought I'd shake things up last week by having zucchini muffins. Woooo! I'm definitely thinking outside the box now, right? I didn't matter, because as soon as I started making them, one of the daycare kids was hanging on me clutching two apples. "Can you please make apple muffins?" Who am I to say no to a kid who wants to eat more apples. So, we constructed a new recipe on the fly.
Apple Zucchini Muffins
1/3 cup butter melted
1/2 cup sugar (I use evaporated cane juice.)
1 egg
1 cup shredded zucchini
2 apples-peeled, cored and chopped (Although I think leaving the peel on would be fine too.)
1 tsp. baking powder
1 tsp. baking soda
1/2 tsp. salt
1 tsp. cinnamon
1 1/2 cups whole white wheat flour (I'm sure you could use all-purpose or bread flour too-I just don't.)
1/2 cup chopped walnuts (optional)
Preheat oven to 350 degrees. Combine wet ingredients in a large bowl. Then add baking powder, baking soda, salt, and cinnamon. Stir it in. Add the flour, stirring until just combined. Fold in nuts if you are using those. Spray muffin cups with non-stick spray or just rub some oil in all of them. Fill muffin cups 3/4 full. Bake 15 - 20 minutes.
These muffins came out super moist and the kids each ate two. That is success if ever I saw it!
Linked up with Muffin Monday at Talking Dollars and Cents
Week 44: Organize for Efficiency
I have been in a serious funk for about the last month. I'm tired of eating the same things, cooking with the same ingredients, looking in the same cabinets stocked to the brim with the same old stuff. Ugh! Throw me a pity party! Yesterday, I decided that I'd had enough of eating the same stuff. I was going to branch out and fix different things. So I head over to allrecipes.com and begin poking around. I found myself quickly overwhelmed and thought, "Now what?"
I have a recipe collection that I've been working on since before I was married. It isn't anything fancy-just a couple of 3 ring binders divided into various categories and when I had several recipes sitting in a pile, I would go through and put them in sheet protectors and file them in the correct category. It occurred to me around 10 o'clock last night that I have hundreds of recipes in my binder that I haven't actually tried.
Hmmm, I think I have a project! I grabbed a few pieces of looseleaf paper to jot ideas on and grabbed my binders. An hour and a half and a couch full of miscellaneous recipes later, I cleaned my binder out and made a menu plan for the next two weeks. There are several recipes that sound great along with some tried and true dishes. I weeded out all of the recipes that I read and thought, "What was I thinking?" or ones that didn't measure up to the new way of eating that we've adopted (remember these binders are close to 15 years old-there was a lot of junk in there).
I'm kind of excited about our menu for the first time in several weeks. Granted, I picked a two week span that is full of busy night or holidays, but I can't pick when motivation strikes, can I?

Here is our menu plan for the next two weeks.
Today (Monday)
B: Banana Muffins, Dried Apples
L: Scrambled Eggs, Biscuit w/ Jelly, Hash Browns, Banana
S: Leftover Biscuits and Granola Bars (I had something else planned, but only had 3 kids, so I didn't make a big effort).
D: Creamy Chicken Enchiladas, Spanish Rice, Refried Beans
Tuesday
B: Pumpkin Bread, Grapes
L: *Sausage Sandwich Squares, Bananas, Peas, Nuts
S: *Zucchini Chip Cookies
D: Chef Salad
Wednesday (day care closes early)
B: Egg Muffins, Apples
L: Pancakes, Yogurt, Applesauce, Dried Cranberries
D: *Mini Frittatas, Hash Browns
Thursday
B: Apple Muffins, Oranges
L: Stromboli, Corn, Peaches, Animal Crackers
S: Apple Slices
D: *Pita Pocket Pizzas, Carrot Sticks or Salad
Friday
B: Waffles, Blueberries
L: PB & J Sandwich, Pearsauce, Broccoli, Deviled Eggs
S: Carrots & Raisins
D: Teriyaki Chicken & Fried Rice
Saturday (out of town)
Sunday (returning late afternoon)
D: *Chicken Lasagna, Salad
Monday
B: Cinnamon Apple Oatmeal
L: Chicken Noodle Soup, Pineapple, Tomato Wedges, Roll
S: Chocolate Zucchini Muffins
D: *Layered Fiesta Casserole
Tuesday
B: *Oatmeal Pancakes, Blueberries
L: Eggs, Biscuit & Gravy, Roasted Potatoes, Mango
S: Cheese & Crackers
D: *Chicken & Dumplings, Carrots
Wednesday
B: *Oatmeal Muffins, Raisins
L: Spaghetti, French Bread, Broccoli, Apple Slices
S: Ham Sandwich
D: *Pork Chops w/ Mushroom Gravy, Mashed Potatoes, Salad
Thursday (closed)
B: *Sausage Quiche
L: Cheeseburger & Fries
D: Tuna Casserole
Friday (closed)
B: Leftovers
L: Leftovers
D: Chili Frito Pie
Saturday
B: Freezer Stash
L: Leftovers
D: Thanksgiving Dinner with family
Sunday
B: Freezer Stash
L: Thanksgiving Leftovers
D: *Breakfast Bake
*Denotes new recipe that I will be trying.
Linked up at Menu Plan Monday on OrgJunkie and On the Menu Monday at Stone Gable
I have a recipe collection that I've been working on since before I was married. It isn't anything fancy-just a couple of 3 ring binders divided into various categories and when I had several recipes sitting in a pile, I would go through and put them in sheet protectors and file them in the correct category. It occurred to me around 10 o'clock last night that I have hundreds of recipes in my binder that I haven't actually tried.
 |
| Discarded recipes from the recipe binders |
I'm kind of excited about our menu for the first time in several weeks. Granted, I picked a two week span that is full of busy night or holidays, but I can't pick when motivation strikes, can I?
Here is our menu plan for the next two weeks.
Today (Monday)
B: Banana Muffins, Dried Apples
L: Scrambled Eggs, Biscuit w/ Jelly, Hash Browns, Banana
S: Leftover Biscuits and Granola Bars (I had something else planned, but only had 3 kids, so I didn't make a big effort).
D: Creamy Chicken Enchiladas, Spanish Rice, Refried Beans
Tuesday
B: Pumpkin Bread, Grapes
L: *Sausage Sandwich Squares, Bananas, Peas, Nuts
S: *Zucchini Chip Cookies
D: Chef Salad
Wednesday (day care closes early)
B: Egg Muffins, Apples
L: Pancakes, Yogurt, Applesauce, Dried Cranberries
D: *Mini Frittatas, Hash Browns
Thursday
B: Apple Muffins, Oranges
L: Stromboli, Corn, Peaches, Animal Crackers
S: Apple Slices
D: *Pita Pocket Pizzas, Carrot Sticks or Salad
Friday
B: Waffles, Blueberries
L: PB & J Sandwich, Pearsauce, Broccoli, Deviled Eggs
S: Carrots & Raisins
D: Teriyaki Chicken & Fried Rice
Saturday (out of town)
Sunday (returning late afternoon)
D: *Chicken Lasagna, Salad
Monday
B: Cinnamon Apple Oatmeal
L: Chicken Noodle Soup, Pineapple, Tomato Wedges, Roll
S: Chocolate Zucchini Muffins
D: *Layered Fiesta Casserole
Tuesday
B: *Oatmeal Pancakes, Blueberries
L: Eggs, Biscuit & Gravy, Roasted Potatoes, Mango
S: Cheese & Crackers
D: *Chicken & Dumplings, Carrots
Wednesday
B: *Oatmeal Muffins, Raisins
L: Spaghetti, French Bread, Broccoli, Apple Slices
S: Ham Sandwich
D: *Pork Chops w/ Mushroom Gravy, Mashed Potatoes, Salad
Thursday (closed)
B: *Sausage Quiche
L: Cheeseburger & Fries
D: Tuna Casserole
Friday (closed)
B: Leftovers
L: Leftovers
D: Chili Frito Pie
Saturday
B: Freezer Stash
L: Leftovers
D: Thanksgiving Dinner with family
Sunday
B: Freezer Stash
L: Thanksgiving Leftovers
D: *Breakfast Bake
*Denotes new recipe that I will be trying.
Linked up at Menu Plan Monday on OrgJunkie and On the Menu Monday at Stone Gable
Tuesday, November 8, 2011
Shepherd's Pie

I don't have a particular recipe. It's one of those "clean out the fridge" kind of dishes. But here's what I used tonight.
4 potatoes, peeled
2 Tbsp. oil
3-4 carrots, peeled and finely diced
2 stalks celery, finely diced
1/2 a medium onion, finely chopped
1/4 cup diced green pepper (I have some already diced in my freezer, I just dumped some in)
1 pound ground beef
2 cloves of garlic (I use the already minced kind-about 2 Tbsp.)
1 1/2 cups tomato juice (or 1 can tomato sauce if you have that)
seasoning to taste (I added salt, pepper, onion powder, garlic powder and a few dashes of chili powder)
1/2 cup frozen corn
1/2 cup frozen peas
2 Tbsp. butter
Milk if needed
Shredded cheddar cheese, optional
Preheat the oven to 350 degrees. Rough chop the peeled potatoes and place in a large glass bowl. Fill with water until potatoes are covered. Add salt if desired. Place in microwave and cook until potatoes are tender (for me, that's 25 minutes).
While the potatoes are cooking, heat oil and add the carrots, celery, onion, and green pepper. Stir frequently until the veggies start to soften. Add the ground beef and garlic. Stir together and break up the meat so it is mostly smaller bites (I have one of those handy dandy Pampered Chef star chopper things that works great. A spoon work too! :) ). When the meat is done and the veggies are cooked, add the tomato juice, desired seasonings, corn and peas. Continue to simmer for 10 to 20 minutes allowing some of the tomato juice to evaporate and the corn and peas to cook. If you use tomato sauce, you probably won't need to simmer as long.
By this time, the potatoes should be done. They can be drained and mashed, adding the butter and milk if needed. Set aside.
Pour the meat/veggie mixture into a medium sized baking dish. I used a 9 inch deep dish pie plate. A 9 x 9 baking dish would also work well. Spread the meat out evenly into the pan. Top with mashed potatoes and spread them over the meat getting as close to the edges as possible. Top with cheddar cheese. Place in the oven for 20 minutes. Upon removal, allow the dish to sit and rest at least 5 minutes before serving.

Linked up at Hearth and Soul Blog Hop-Penniless Parenting
Monday, November 7, 2011
Weeks 42 & 43 Crawling out from under my rock
Last week, I asked for suggestions for what to do. Michelle suggested looking at my recycling habits. Initially I shrugged that off since our town has single sort recycling that is picked up weekly. Then I started looking closer. While there are drop points for glass recycling, it isn't part of the single sort pick up. We have to make a trip to drop the glass off, so we don't do it regularly. We don't have a good reason for not doing it at least weekly since one of the drop sites is in the parking lot next to where the kids go to school-it's not like we aren't there 6 days a week (also our church).
I went through the cabinets and collected these, plus a few others that I found in the dish drainer.

So, at this point I think I'm all good... then I went to grab a Wal-Mart bag (general name for plastic shopping bags) and a sense of realization smacked me in the head and called me a hypocrit. One of the most simple things to do to "be green" and I don't do it often enough. I don't bring my own bags when I do my shopping (hanging head and waiting for 50 lashes). I have several cloth bags and I take them to Aldi with me, but not to other stores. I can even get $.05 off for each bag I use at a couple of our stores. Yet, I can't seem to remember to do it.
Consequently, I have probably close to a hundred Wal-Mart bags hanging in my stairwell in one of those hideous bag sleeves that my Grandma made (sorry Grandma, they aren't very attractive). I made it a point all of last week to collect any plastic bag that I used and put it in one big bag to collect. I was astounded and embarrassed. It is jam packed full (bursting at the seams).
I have felt like I do a pretty good job of recycling, but this past week showed me how wrong I was. I will take my giant bag of bags to be recycled at Wal-Mart or maybe Target, and I WILL remember to bring my own bags with me from here on out.
Well, since I already hanging my head in shame, I might as well tack on week 43. My grocery budget has become a nightmare. Prices are increasing, summer produce is dwindling or already gone, and we have been eating out too much (like once every other week, but at $30 a pop, it will take a hit to the budget). Our budget, in general-not just food, is so out of control that this month we have to make double payments on 3 bills because we spent the money needed to pay them. Granted, not everything we bought was dumb, but it certainly wasn't planned for and if we are to continue to work on whittling down our debt and trying to eat better, we need to get our act in gear.
For the first time in a long time, I went to cash only for all extra expenses (monthly bills not included). My Azure Standard order was $200 this month, so that leaves $300 for the rest of the month-theoretically. However, since we are making double payments on some of our bills, that amount was cut. I got $125 on November 1st and will get $150 on November 15th.
Immediately the amount from the first was cut by $25 because there was a doctor copay that wasn't budgeted. So with $100 for two weeks, it has been pretty tight. With the Azure Standard order and the other items I buy in bulk, we certainly aren't in danger of starving, but I'm having to get creative in coming up with ideas that use either ground beef or chicken, as those are the only cuts of meat we have on hand. We are having a lot of bean based soups and vegetarian meals like breakfast for dinner or tortellini alfredo (not uber cheap, but it was tasty).
Tomorrow I will try to get my meal plan posted (did I mention I didn't do those for a month or so and that started the disintegration of my food budget-some people never learn!). I think I will go $5 over budget to pick up some ham. It won't be nitrate free, but this week I can't afford the super expensive stuff. And, if this is the first lunch meat we've eaten that has sodium nitrate in several months, surely we're better off than the fellow that eats it every day. At least that's what I'm telling myself.
Tuesday, October 25, 2011
Creamy Chicken Enchiladas
 |
| Creamy chicken enchiladas with homemade Spanish rice and a dallop of sour cream. Yum! |
2 Tbsp. butter
2 Tbsp. flour
1/2 cup milk (can sub. the milk for chicken broth if desired)
1/2 cup chicken broth
1/2 cup sour cream
1 cup salsa
2 teaspoons chili powder
2 cups chopped cooked chicken
3/4 cup shredded cheddar cheese, divided
8 flour tortillas (6-inch), warmed (I made these using my tortilla recipe.)
1 small tomato, chopped (about 1/2 cup), optional
1 green onion, sliced (about 2 tablespoons), optional
Preheat oven to 350 degrees.
In a medium saucepan, melt the butter. Stir the flour into the butter and let cook a few minutes. Whisk in milk and broth and bring to a boil. The mixture will thicken. Remove from the heat and give it a few minutes to cool. Stir in the sour cream, salsa, and chili powder. In a mixing bowl combine 1 cup of the soup mixture, chicken and 1/2 cup of the cheese. Spray a 9 x 13 baking dish with Pam or some other spray and pour 1/3 to 1/2 cup of the soup mixture in the bottom. Shake the pan around until most of the bottom of the pan is covered with soup.
Next a tortilla and spoon some of the chicken mixture down the center of the tortilla and roll it up. Place it seam side down in the baking dish. Continue doing this with the remaining tortillas trying to divide the chicken mixture equally among the tortillas. Once all the tortillas have been filled and placed in the pan, cover them with the remaining soup mixture. Cover the dish with foil or glass lid and bake 40 minutes. Remove from the oven and sprinkle remaining 1/4 cup of cheese over the top. Place back in the oven to melt the cheese. Take the enchiladas out and let rest for 5 minutes. Top with chopped tomato and green onion if desired.
I was a little skeptical with the cream soup base, but these were awesome! Everyone had seconds and I had to hold them back so they didn't take the rest as I needed leftovers for the next day's lunches.
Sorry about the funky indent. I couldn't fix it and gave up!
Week 42: Needing suggestions
Help! I am brain dead and can't think of what needs to be changed this week. I'm taking suggestions in the comments section. Thanks. :)
Wednesday, October 19, 2011
Week 41: Winterizing the home
There's a saying in Missouri that goes, "if you don't like the weather, give it 5 minutes and it will change."
Yeah. It's the truth. Really.
Last Friday night, the girls and I went through the "winter" box of clothes and pulled out what fit, made a sale pile for the "I'm never, ever wearing that in a million years," and put away the summer stuff (no more flip flops girls!). The weather had turned cooler and while they could still get away with wearing capris, jeans would work and I hate not being prepared.
Fast forward to Sunday. It was near 90 degrees and the girls had to get back into the "summer" box to dig out shorts and those flip flops.
Today is Wednesday. It is 47 degrees according to my thermometer. The girls wore winter coats to school today. Amazingly, they didn't complain. They were that cold.
Keeping in line with my earlier change of trying to reduce our electricity usage, I'm also trying to cut our natural gas usage (furnace) too. I turned off the AC in mid August and I'm trying my hardest not to turn on the furnace until November 1st. I have 12 days (hopefully more).
It is winterizing time. Last year was the first time that I made a conscious effort to lower our winter utility bill. We dropped the temperature to 65 degrees during the day. I kept all of the doors upstairs closed. We used blankets, wore layers and slippers and all that stuff. I tried to do my baking early in the morning to warm up the house. We slept on fleece blankets and covered with them (and quilts, comforters and everything else) as well.
The question is how can we improve on our efforts this winter. The first thing I'm going to work on is draft guards for the front door and downstairs basement door. Both doors have gaps that you can see through. The weather stripping that we've tried in the past has prevented the door from latching and the only thing worse that a door that you can see daylight around is a door that is standing open because the wind blew it open. My challenge is that the gaps are between the door latch and the top of the door. I'm going to have to fashion something that goes all the way around. I'm sure it will be lovely. Uhh, not really. I don't need lovely. I need functional so we'll see how that works.
The other area that needs work are the windows. We have new double pane windows, but the air around the window always seems to be so cold. I'm making Hubby put the shrink wrap on the bedroom and living room windows to see if it helps. It's only a $10 investment. If it doesn't work, that's not too much money lost. Hubby thinks I'm crazy. He says that was the point of buying new windows. I don't know though. It couldn't hurt.
Other suggestions are both welcomed and appreciated!
Week 40: Preserve, preserve, preserve!
Well, last week (and half of this week) flew by and I didn't even get one post in! It's that time of year... fall! I love fall--the cool weather, leaves changing color, switching out our summer duds for warmer winter ones. Of course, the frugalista in me is loving not having to use our AC or heat. Woo-hoo for cheap utilities. Fall is also the time when I do a lot of our favorite foods are ripe and need to be preserved. I spent my time last week roasting, pureeing, labeling, freezing, and other sorts of prepping activities.
Here's what I preserved/am preserving for winter...
10 pounds of tomatoes-sliced, seeded and frozen-ready to be chopped for chili or blended for juice in a veggie or taco soup. If I can find a good deal on Romas, I'll probably do another 10 pounds.
Green Peppers-We have four green pepper plants that started producing a couple weeks ago. So, I washed, seeded, and chopped 8 green peppers-not a lot, but we don't eat a lot. I flash froze them and have them stored in a quart canning jar so I can pop open the freezer and dump the amount I need directly into my bowl, skillet or whatever. I hope to have a few more peppers, but it looks like we might get frost in the next couple of days, so we'll see.
7 pumpkins-I haven't frozen pumpkin ahead in past years. I usually just cooked one and made a couple loaves of pumpkin bread and called it a year. Well, since I ditched canned goods earlier this year and had no plan of purchasing an can of pumpkin if I decided that I needed some, I set out in search of pie pumpkins. Amazingly enough, a local grocery store had organic pie pumpkins for $1.29 each! The cheapest I had previously seen them was $.78/pound and they weren't organic. I snatched up 2 immediately (and a butternut squash) and roasted them. One pumpkin made the equivalent of 3 loaves of pumpkin bread and everyone gobbled it up. It was obvious that I needed more. I called Hubby who was on his way home from work and requested that he drop by and pick a few more up. He bought 5. Now I have enough pumpkin for 21 loaves of pumpkin bread-certainly enough for a whole year.
50 pounds of pears-Just when I finished the pumpkins up, one of my daycare grandmas brought me a HUGE box of pears, a little over 50 pounds (yeah, I weighed it)! Right now, they are on my deck ripening because they just aren't quite ready. I processed them too soon last year and still have a few jars of crunchy pears! LOL Hopefully in the next couple of days they will be turned into pear butter, pearsauce, canned pears and I'm going to try freezing some for pear crisp. That's an experiment, we'll have to see how that works out!
40 pounds of apples-These haven't arrived yet, but they are on my Azure Standard order. I'll make the standard applesauce, apple butter and sliced apples for future bowls of oatmeal or slices of pie, but I might also try my hand at making jelly and/or juice. Oh, and I'm sure we'll save some for eating as well. ;)
So, that's it so far. What foods do you preserve? What's your favorite method... canning? freezing? dehydrating? I'd love to hear about it.
Wednesday, October 5, 2011
Week 39: Sam's Club
I've been a member of Sam's Club for nearly 20 years (Wow, now I feel old!). My parents added me to their membership when I left for college because I would drive through a town where Sam's was and frequently Mom would want me to pick up this or that. In my 20's, I shopped there more for myself and found that I bought numerous items, many of which I didn't need.
Today, I still make a once a month trip to Sam's. However, I'm finding that I buy less and less there. Where at one time I would have my cart loaded down, now I buy the same two dozen items in alternating months. I buy Finish dishwasher tabs, Oxy Clean powder, nuts, spices, maple syrup, milk, cheese and frozen veggies and fruits. This last time I also picked up a few packages of medicine (Benadryl, Tylenol, Prilosec-except Sam's brand). I no longer buy the paper goods, chips, bread, fruit, etc. that made Sam's prices such a good buy.
Last Friday, I picked up my first order from Azure Standard. I got coconut oil, GMO free canola oil, coconut, walnuts, vanilla beans, salt, carrots, potatoes, and oranges. Most importantly, I got a catalog. Going through it, I found that I can get most everything I can get from Sam's and it's only slightly higher priced, and much of it is organic, which Sam's is not. Over the next month or two, I plan to phase out Sam's completely and order my bulk items through Azure Standard. I will pay a little more in up front cost, but I don't have to drive 40 minutes to Sam's and spend 2 hours walking the aisles. With Azure Standard, I can order online and just go to the drop site and pick up my boxes of already packaged items.
I'm not sure what I'm going to do about my Finish tabs or Oxy-Clean yet, but I think I might just ask Mom to pick me up some when she goes for her big trips and I'll pay her back. That seems the easiest.
So far, I'm really impressed with the products I got from Azure Standard. So much so that I think I'll try to do the bulk of my shopping from there and fill in with dairy and eggs from a local farm. I'm sure that toward the end of the month I'll need fresh produce, but I'm thinking that this might be the best way to stay within my budget. It keeps getting harder and harder to do that.
Thursday, September 29, 2011
Oatmeal Raisin Cookies
I started this post last week (during sugar week), but life got in the way as usual and I just now found it. My mother would say "it's a good thing your head is attached or you'd surely lose it." Yep, Mom, you are right again!
Preheat oven to 350°F (175°C).
Bake 10-12 minutes on a prepared cookie sheet (either greased or lined with parchment paper). Allow to sit for a couple minutes before removing to a cooling rack.
I was worried that there wouldn't be enough sugar, but much to my delight, they were still awesome and everyone loved them. No one said a word about them not being sweet enough. Why have a been waiting so long to do this.
 |
| The recipe made close to 40 mini cookies, but by the next morning, this is all that remained. Like any good mother, I hid them and ate the rest sneaking them one by one. |
Oatmeal raisin cookies are my absolute most favorite cookie, and my favorite of all oatmeal raisin cookies is Smitten Kitchen's version.
The recipe goes like this (with my modifications in red)
1/2 cup (1 stick or 4 ounces) butter, softened
2/3 cup light brown sugar, packed 1/3 cup evaporated cane juice
2/3 cup light brown sugar, packed 1/3 cup evaporated cane juice
2 tsp. molasses
1 egg
1/2 teaspoon vanilla extract
3/4 cup all-purpose flour 3/4 cup whole white wheat flour
1/2 teaspoon baking soda
1/2 teaspoon ground cinnamon
1/4 teaspoon salt (I often use a half teaspoon, but I like more salt in my baked goods)
1 1/2 cups rolled oats
3/4 cup raisins
1/2 cup walnuts, chopped (optional) I skipped these because I cannot get those daycare kids to like walnuts.
Preheat oven to 350°F (175°C).
Cream together the wet ingredients. In a separate bowl, combine the flour, soda, cinnamon and salt. Add the dry ingredients to the wet and when well incorporated, fold in the oats, raisins and walnuts if you get to use them.
Bake 10-12 minutes on a prepared cookie sheet (either greased or lined with parchment paper). Allow to sit for a couple minutes before removing to a cooling rack.
I was worried that there wouldn't be enough sugar, but much to my delight, they were still awesome and everyone loved them. No one said a word about them not being sweet enough. Why have a been waiting so long to do this.
Week 38: Rice
With the switch to whole wheat flour, I tried to switch everything to whole grains and succeeded for the most part. I parted ways with my Minute Rice, which always came out wonderfully fluffy and bought 10 pounds of brown rice. Well, there must be a serious learning curve with brown rice because I always had one of two results. Either the rice was crunchy despite the liquid being absorbed or the liquid was absorbed and I had a mushy glob of starch substance. Neither was really appetizing, as my family so lovingly pointed out. :(
On the menu for tonight is stuffed pepper cup casserole. I tried it earlier in the crockpot and it was ok, but now that I've got the rice thing solved, I want to try again! I'll post a picture tomorrow.
I had kind of given up on rice. I made a decent chicken Rice-A-Roni knock off. The flavor was spot-on, but the texture of the rice was an issue. Due to some unforeseen circumstances, we've found ourselves on the short end of money lately and I asked for help on my favorite forum to come up with ways to use that brown rice (as I still had several pounds left). Michelle from Recipes from Michelle's Kitchen, came to my rescue when I mentioned that I had trouble getting my rice to be done and not sticky. Here is her recipe.
IT IS BAKED! Who knew? My first time I had a little trouble because I couldn't get a tight seal on my baking dish, so the liquid evaporated and my rice still wasn't done. Now, I use my oven safe skillet with tight fitting lid and it works like a charm. Over the past two weeks I've come up with several ways to use this baked rice in all my dishes. Here are a few.
 |
| Green rice with meatloaf and steamed broccoli |
Green Rice, aka cheesy broccoli rice-Bake plain rice and when it is done, add cheese sauce and chopped broccoli. Return to oven for a few minutes to heat through. It was awesome the first night, but it didn't reheat well, so I will mess with the recipe a bit more.
Chicken Rice-A-Roni-Add seasonings to rice and cook in chicken broth instead of water. I served this with homemade chicken nuggets, but it would also be good to chop up some leftover chicken and stir it in.
Spanish Rice-I've done this two ways and my preferred method is to make plain rice and let it cool. I did a double batch and stuck half in the fridge until I was ready to use it. Saute onions and minced garlic in a small amount of butter or oil until translucent. Add 1/2 cup or more salsa (I personally prefer black bean and corn) to the skillet and warm through. Add rice and stir salsa mix throughout. Heat through. You can top with shredded cheese and sour cream. That's what we did with the leftovers and it was delish!
Tuna and Rice Casserole, like tuna noodle casserole only rice. I make the same sauce as for the noodle version (only now I don't use cans, I use the pouch tuna). Pour it over the baked rice and stir. I grated some parmesan over the top and the daycare kids happily scarfed it down, even my son who cannot stand rice. Wonders never cease!
Fried Rice-a wonderful way to use leftover rice. Chop onions and a bit of garlic and saute in oil. Add peas and carrots (I use frozen) and heat through. Add rice in and stir it all up. Scrape the rice to the side of the pan and scramble 2 eggs on the empty side. When the eggs are about 2/3 cooked, stir them into the rice. Add soy sauce to taste. It was by far the best fried rice I've ever made (Minute Rice days included!).
Wednesday, September 21, 2011
Project Lunch Box
I'm linking up with Project Lunch Box, part of the Family Fresh Cooking Blog. They have tons of ideas for packing lunches and are winding up an EasyLunchBoxes giveaway. I can always use more of those containers!
Here's the link.
Here's the link.
Tuesday, September 20, 2011
Week 37: Sugar
I didn't post this week's challenge yesterday because I still hadn't come to terms with it. But, since it's the big elephant in my healthy eating closet, I might as well address it. It's sugar (hanging my head in shame)! For months, my family's sugar consumption has been in the back of my mind. For the most part I shrugged it off by saying that we didn't eat THAT much sugar. Besides, we do so well on so many things, I really don't need to monitor our sugar intake that closely.
Sadly, Saturday morning the facts were staring me in the face. I dumped the last of our sugar bucket into the canister. You may remember when I made my first bulk purchase. I went back to check the date. It was March 12th that I bought 50 pounds of evaporated cane juice. So, in slightly more than 6 months, my family (and daycare kids) have consumed 50 pounds of sugar. Eek! Of course that doesn't include the already prepared foods we buy whether they be bags of tortilla chips, a candy bar or the dozen donuts that my husband will dive 20 miles for at 5:30 in the morning just for his "fix."
Just the thought of consuming 50 pounds of sugar makes me nauseous. I was so distraught about it that I brought it up to Hubby. He said, "Well that's only 10 pounds each." Yeah, no help there. Since Saturday, I've been thinking of ways to reduce our sugar intake. I don't plan to eliminate it completely because I value my marriage and I know full well that sweet tea ranks higher than me any day. Even if it's not gone completely, there are a number of things I can do and I think most are things that my family won't notice (I find that those are the best changes.).
- Whatever the amount of sugar is in a recipe (or the amount I use), cut it in half.
- Use maple syrup and honey where applicable.
- Make/eat fewer sweets.
- Incorporate whatever sweets we are eating into the meal, rather than eating them separately, ie. a muffin with a scrambled egg for breakfast rather than a bowl of ice cream before bed.
Friday, September 16, 2011
Tortillas

Last night it was as if the clouds parted, a choir of angels descended and began singing, "Hallelujah! Hallelujah! She did it. Made tortillas! Hallelujah!!!" Ok, I might be exaggerating a tad, but seriously my quest for decent from scratch tortillas has been a multi-year quest. It has finally come to an end.
I have tried several recipes and while they were all tasty, I hadn't found "the one." Most of the time, I couldn't get them rolled thin enough and they ended up being more like flatbread than a tortilla. I posted my problem on the kitchen forum on Diaperswappers a while back and Nikki offered her recipe. It was super simple, required no special ingredients, was whole wheat... what more could I ask? Tortilla making has been on my "to do" list for a while and last night I finally got around to making them. The dough mixed up very easily, and rolled out really well. I don't think I had my skillet hot enough for the first couple tortillas, but once I got going it was super easy. While I had one cooking in the skillet, I rolled the second and so on. Once I was finished, I made myself a bean and cheese quesadilla that was so yummy. It was just refried beans, cheese and tortilla. Please do keep in mind that it was nearing 9 pm and I still hadn't eaten, so that could've been part of the reason it was soooo good.
I bagged those bad boys up in a Ziploc bag and into the refrigerator they went. I was a bit worried this morning when I pulled them out and there was condensation all over the bag (oops, didn't let them cool completely), but when I got them in the pan this morning for sausage, egg and cheese quesadillas, they crisped up nicely. I also had a little extra spaghetti meat from earlier this week and thought, "Heck, why not?" So I made up some egg, meat and cheese burritos. Now, it's not something I would have every day, it wasn't half bad. I added extra cheese and we all know that cheese makes everything better!
So, without further adieu, I present my tortilla recipe (and Nikki's and anyone else who might have decided to try it)! LOL
2 cups whole wheat flour
1/2 tsp. salt
3 Tbsp. oil (I used EVOO)
2/3 cup warm water
I placed the flour and salt in my food processor and gave it a quick whirl to combine it. Then I drizzled in the oil, followed by the water. The dough was slightly sticky when I pulled it out of the processor, but a quick dusting of the counter and kneading it a couple of times, it became very workable. I rolled it into a ball, placed it in a bowl, covered it with a towel and let it sit on the back of the stove for 20 minutes.
When the 20 minutes was up, I scooped the dough out of the dough and kneaded it a few times. Then I separated the dough into equal portions. I even went so far as to weigh the dough and divide it into 11 equal portions (but you definitely don't have to do that)! Roll each portion into a ball and place on a plate, cover and let rest for 20 minutes. I just threw them together in a pile on a salad plate and well they REALLY stuck together. In the future, I will be sure that the dough balls don't touch.
OK, 20 minutes is up and you are ready for some tortilla making. Let your ungreased skillet get hot, and by hot, I don't mean warm, been there done that! Take a ball of dough out and on a lightly floured surface roll it out to a 6-8 inch circle. I didn't need to flour the counter, they weren't sticking so I skipped that part. Also, my tortillas weren't really circles, but I figure practice makes perfect on that.
Lay the tortilla in the skillet and grab another piece of dough to roll out while you count to 20. Flip the tortilla in the skillet, continue rolling and count to 20 again. Remove the tortilla from the skillet and place on a plate and cover with a towel. Place the tortilla you've been rolling into the skillet and start all over. Toward the end, my skillet was hot enough that it only took 15 seconds to adequately cook a side, so I was speed rolling to keep up, but all of them managed to get done and I didn't burn any (surprise, surprise)!
Tuesday, September 13, 2011
McGriddles Knock-off

I altered my regular pancake recipe a bit and came up with this.
1 cup whole white wheat flour
2 tsp. baking powder
1/4 tsp. salt
2 Tbsp. maple syrup
1 cup milk (if I'm doing dairy free, I use rice milk, but today I used regular whole milk)
2 eggs
1/2 cup of pork sausage, already browned and drained
I measure the dry ingredients into a mixing bowl and then measure out the wet ingredients. I have a measuring cup with graduated measurements, so I use the 2 cup one and add the milk then eyeball the maple syrup (2 tablespoons is 1/8 of a cup or halfway between 1 and 1 1/4 cup if I'm using my measuring cup. :) ). Then, I add the eggs and whisk it around to break up the yolks before dumping all of the wet ingredients into the dry. Whisk until everything is pretty well combined. If you have a few lumps, don't worry about it. Fold the sausage into the batter. I suggest using something besides your whisk or you'll end up with sausage pieces stuck in the middle of the whisk. I know this happens yet I do it every time! Sometimes, I am a seriously slow learner!.
Get your griddle or skillet hot. I have a cheapy one, so at 250 degrees, mine will burn the first batch but undercook the second. Then I have to turn it up to 300. So, use whatever temperature works for you (or read the directions if you are REALLY aren't sure-I try to limit that to emergency situations only though). Using a 1/4 cup measuring device, I have a scoop, ladle out the batter on to the griddle. You can do as many as will fit in your space. When bubbles start to form on the top, pop and stay open, the pancakes are ready to flip. Depending on how much sausage was in each pancake, I noticed that some didn't get the number of bubbles they usually do, so then I watched the edges of the pancake and flipped it when the edge was golden brown and started to lift away from the griddle. Cook the second side 3-4 minutes or until it is golden brown as well. This time I made half a batch and it made 6 four inch pancakes, so I'm guessing that a regular batch would make 12-at least that's what one would think.
While the pancakes are cooking, I cooked my egg for the middle of my sandwich. I found a bowl that was the relatively the same size as the pancakes and generously sprayed it with olive oil spray. Then I cracked one egg in the bowl, added a bit of salt and pepper and whisked it all together with a fork. The bowl went into the microwave and 1 minute later I had a perfect circular egg "patty" for my pancake sandwich. I grated some cheddar cheese on top of the egg and returned it to the microwave for 10 seconds and then left it in there while my pancakes finished cooking. When the pancakes were finished, I scooped the cheese covered egg out of the bowl and placed it on the bottom pancake. I topped it with a second and voila-a McGriddle.
I think it tasted wonderful. The only thing I am wondering about is if in the actual McDonald's sandwich, the pancakes are crisp on the outside. Mine were a little spongy, like pancakes are. But, I'm thinking that if I were to freeze them and then toast the pancakes to thaw instead of microwaving them, that it would crisp them up nicely. Whatever the case, I thought it was yummy. I froze enough for 2 more sandwiches and I hope to get the girls to try it out before school tomorrow. I'll update with their feedback.
Chocolate Zucchini Cookies

1/2 cup coconut oil
2 eggs
2/3 cup sugar
2 Tbsp. molasses
1 tsp. vanilla
1 tsp. baking soda
1/2 tsp. salt
2 1/4 cups whole white wheat flour
1/3 cup cocoa powder
2 cups shredded zucchini
1 cup of chocolate chips
Mix the wet ingredients. Mix the dry. Add the dry to the wet and then fold in the zucchini and chocolate chips. Now, if you use my method, you will just dump it all together and mix it up. I find that it still turns out fine. I probably didn't use a full cup of chocolate chips, I just dumped the last chips out of two bags and then chopped up the lone semi-sweet baking chocolate block that I've have for eons. It was more than enough.
The dough was really dry and crumbly due to the coconut oil solidifying when I added the flour from the freezer. I just kept folding in the zucchini and eventually the moisture of the zucchini prevailed and I had a nice dough-almost too moist even.
Bake 8-10 minutes in an oven preheated to 350 degrees. I used a tablespoon scoop and the recipe made about 55 cookies. It was enough for 3 each for all of the daycare kids and my kids and they will go in lunches tomorrow and I'll still have some to freeze for a picnic lunch on Saturday. Pretty cool in my opinion.
The kids loved them and even complained when I cut them off at three cookies each. This recipe if for sure a keeper!
Monday, September 12, 2011
Week 36: Bye Bye Shredded Cheese
Just when I think that I'm doing good, someone comes and bursts my bubble! I should know by now that every single thing I buy needs to be scrutinized, yet I still give items the benefit of the doubt and I shouldn't. The latest example is shredded cheese. Every 3-4 months one of our local grocery stores will have 6-8 ounce bags of shredded cheese on sale for $.97 with no limit. Woo-hoo! I love cheese. A lot. So it would be nothing for me to go in and buy $30-50 worth of cheese depending on how much money I had in the budget. I would freeze it and pull a bag as I needed to.
My cheesy life was all grand until one day a couple weeks ago when someone on a forum that I frequent asked about the potential savings of block cheese versus shredded. Several people pointed out that they won't eat shredded because of the additives in it. Hmmm, really? So off I go to check out my bag of cheese. Lo and behold, I find that every bag has anti-caking agents, and a specific ingredient: cellulose.
After doing a little research, I found that cellulose is one of the main components in the cell walls of plants. This sounds a little reminescent of high school biology class. Essentially, cellulose is all natural in that it comes from plant fibers. However, it is highly processed and used in a number of food products, as anti-caking agent in cheese being one of them. Granted, I suppose using cellulose is better than using something completely chemical, but still I don't think my cheese needs these "extra" ingredients. If I want to eat plant fiber, I'll eat plant fiber. I don't want it in my cheese.
So, from now on, I'll be purchasing blocks of cheese and grating them myself. I don't have the cool attachment on my food processor to do it quickly, so I'll just do it by hand as needed. Since cutting back on dairy to help Baby Girl's eczema, we don't need to be eating alot of cheese anyway. Grating it myself will just be one of the ways to limit myself from wanting it all the time. At least, that's what I'm telling myself. :)
Friday, September 9, 2011
Preserving Nature's Bounty
It's no secret that I like to save money where I can. One of the best ways is to preserve summer produce when it's plentiful so you can eat that food through the off-season. Each year I garden in hopes that I will grow enough for us to eat through the summer and can or freeze it to have later. It didn't work out this year the way I'd hoped. We planted tomatoes, cucumber, zucchini, cantaloupe, green peppers and pumpkins. Well we got 1 cucumber, 1 green pepper and enough grape tomatoes to keep our salad plates pretty but that's it. I still hold out hope for the peppers, as they have several blooms but otherwise I think we're done.
I found roma tomatoes for $.99/pound and bought 5 pounds of those to dice for chili, hamburger helper and such. I've also been buying strawberries any time I see them reasonably priced and making jam. Unfortunately we go through that so quickly I think I only have 2 pints left. That probably won't get us very far! LOL
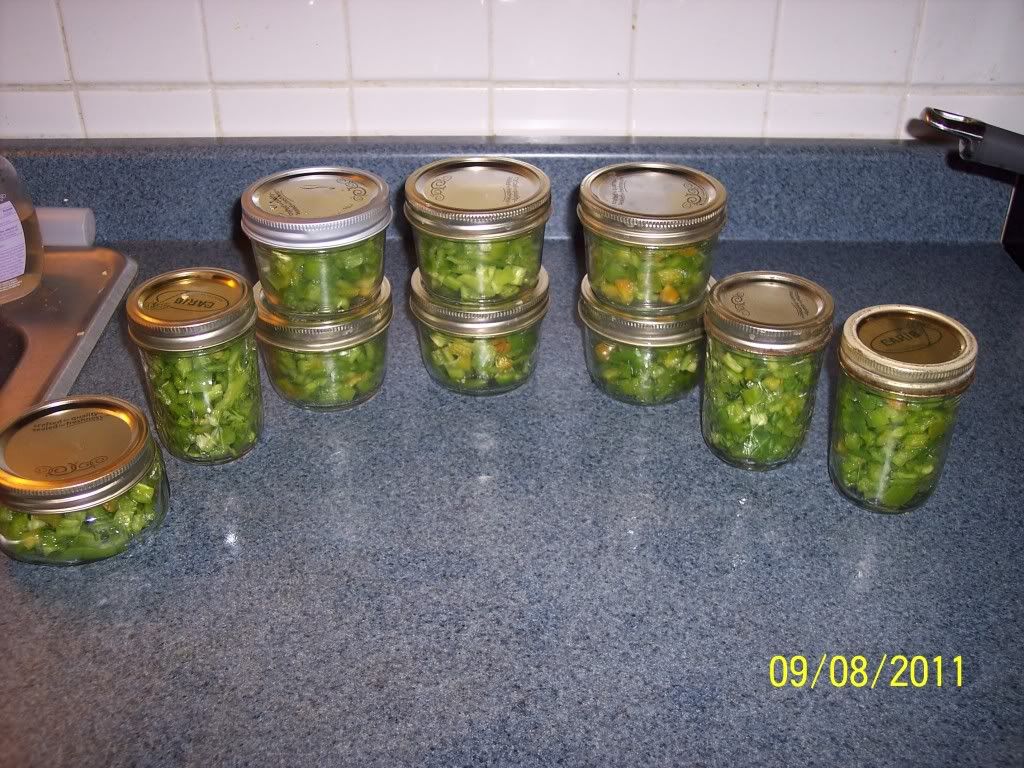 One of the things that has been in the back of my mind is green chilies. I love white chicken chili and my recipe calls for an 8 oz. can of green chilies. Since I ditched can goods a while back I've wondered what I'm going to do for the chilies. I guessed that it would be expensive to buy 2-3 for each batch. I searched for a jarred variety, but was unsuccessful. I wasn't sure what I was going to do. That is, until I was wandering the produce section the other night and found a great sale on Hatch chilies. They were $1.68/pound. I purchased 2 big bags. At the checkout the guy couldn't find the code, so he gave me each bag for $1.68. I did tell him that there was more than a pound in there, but he said it was too much trouble to figure it out in his head. This would be the bonus of grocery shopping at 1 am!
I found roma tomatoes for $.99/pound and bought 5 pounds of those to dice for chili, hamburger helper and such. I've also been buying strawberries any time I see them reasonably priced and making jam. Unfortunately we go through that so quickly I think I only have 2 pints left. That probably won't get us very far! LOL
One of the things that has been in the back of my mind is green chilies. I love white chicken chili and my recipe calls for an 8 oz. can of green chilies. Since I ditched can goods a while back I've wondered what I'm going to do for the chilies. I guessed that it would be expensive to buy 2-3 for each batch. I searched for a jarred variety, but was unsuccessful. I wasn't sure what I was going to do. That is, until I was wandering the produce section the other night and found a great sale on Hatch chilies. They were $1.68/pound. I purchased 2 big bags. At the checkout the guy couldn't find the code, so he gave me each bag for $1.68. I did tell him that there was more than a pound in there, but he said it was too much trouble to figure it out in his head. This would be the bonus of grocery shopping at 1 am! I headed home and planned to work on them the next night... and the next... and the next. Well I finally got around to it last night and a few were mush (grrr!). I cleaned up and diced everything that was good and managed to get 10-8 oz. jars of chilies. I froze them just because the thought of getting the canner out at 10 pm wasn't appealing. Hopefully they will work well in my chicken chli. I figured I would saute them with the onions to get them soft. That's the plan-if that doesn't work, I'll try something else.
As far as money goes, I spent $3.36 on the peppers. I already had the jars, lids and rings, so no new expense there. If I recall correctly, a 4 oz. can of chilies at the store was $.74. So, multiplied by 20 (the amount of 4 oz. jars I would have), the total is $14.80. I saved $11.44 by doing it myself, plus I have the added benefit of not having BPA in my chilies! Woo-hoo!
Chicken with Wild Rice Soup
This week the weather is significantly cooler. Thank goodness! I don't mind the heat, but we've had a REALLY hot summer and 70 degree weather is a Godsend. With the cooler weather, I was inspired to make soup. Of course I couldn't just make any soup. I made chicken with wild rice.
For over half of my nearly 40 years, I didn't care for soup. It was ok, but I would have much rather had a sandwich. All that ended when I took a job at a local mall in college. The smell of soup and freshly baked bread drifting down the center of the mall was intoxicating. I became hooked on St. Louis Bread Company's (now Panera) chicken with wild rice soup. I shudder to think of how much money I spent purchasing the "You Pick 2" special. I tried two or three times to replicate the soup and finally gave up as the ingredients were expensive.
This was before my "health kick," as my Mom affectionately calls it. Pulling out the recipe the other day, I realized that I would have to make some alterations. Here's what I ended up with.
4Tbsp. butter
1/4 cup flour
1 tsp. salt
3 cups milk, divided
4 medium potatoes, peeled and diced into 1/2" cubes
1 small onion, chopped
3 cups of chicken broth (more if needed)
1/2 tsp. black pepper
1 very large chicken breast, cooked and diced
 This amount fed the 5 of us dinner, our neighbor who recently had surgery, lunch for Hubby and the girls the next day and 3 breakfast portions for the girls before school. I had grand notions of taking a beautiful picture to share, but when I got the bowl out of the fridge, this is what I found. Sorry it isn't glamorous.
For over half of my nearly 40 years, I didn't care for soup. It was ok, but I would have much rather had a sandwich. All that ended when I took a job at a local mall in college. The smell of soup and freshly baked bread drifting down the center of the mall was intoxicating. I became hooked on St. Louis Bread Company's (now Panera) chicken with wild rice soup. I shudder to think of how much money I spent purchasing the "You Pick 2" special. I tried two or three times to replicate the soup and finally gave up as the ingredients were expensive.
One day last year I happened upon this recipe. It seemed like it might be a possibility. It had things in it that I already had around the house or could pick up easily at the store so I gave it a whirl. It was good-not as good as my beloved St. Louis Bread soup, but I decided that I could've built that up in my mind (it happens a lot to me).
This was before my "health kick," as my Mom affectionately calls it. Pulling out the recipe the other day, I realized that I would have to make some alterations. Here's what I ended up with.
1/4 cup flour
1 tsp. salt
3 cups milk, divided
4 medium potatoes, peeled and diced into 1/2" cubes
1 small onion, chopped
2 cloves of garlic
3 large carrots, peeled and sliced into coins
1 cup wild rice3 cups of chicken broth (more if needed)
1/2 tsp. black pepper
1 very large chicken breast, cooked and diced
Begin by melting the butter in a medium saucepan. Once butter is melted, add the flour and whisk it in allowing it to cook down for a few minutes (5 or so). Add the salt and 2 cups of milk whisking vigorously to get rid of any lumps. Allow to simmer until thickened, making a roux. While that is thickening, prepare the veggies and throw them into the crockpot. Add the rice, roux, 3 cups of chicken broth, pepper, and chicken pieces. Stir thoroughly and cover. Set crockpot on low and cook 7-8 hours. I checked it every couple of hours and stirred it. If the rice is taking too much liquid, you may need to add more chicken broth. With about 30 minutes left before serving, add the remaining cup of milk and allow it to heat through. You could use half-n-half here and it would make it creamier, but I didn't want to buy half-n-half. It seems that when I do, it always goes bad or I'm scrambling around the day it expires looking for a way to use it. The milk worked fine.
 This amount fed the 5 of us dinner, our neighbor who recently had surgery, lunch for Hubby and the girls the next day and 3 breakfast portions for the girls before school. I had grand notions of taking a beautiful picture to share, but when I got the bowl out of the fridge, this is what I found. Sorry it isn't glamorous.
 Wednesday, September 7, 2011
Week 35: Electricity!
Just typing that word makes me think of Schoolhouse Rock. LOL
With lowering our water consumption last week, working on electricity this week shouldn't be a big shock. My only issue is that with our water being reasonably cheap, I haven't tried to cut back on it before. Our electric bill, on the other hand, gets out of control quickly, so I feel like we're making more of an effort there to start with. I know that there's always room for improvement however, so that's where I'll start.
I have made a tour of the house and unplugged everything that was not of absolute necessity. That would be the alarm clocks and lamp in our bedroom (the lamp is plugged in behind the bed and really not convenient to manually plug in every time), the phone in the kitchen and computer downstairs. Then of course are the major appliances, but I don't plan on messing with those. I unplugged everyone's nightlights and lamps and the can opener. This raises the question, why do I have a can opener when I don't use canned goods? And, why does it always need to be plugged in? Ummm, I don't know and it doesn't. So, one task for the week will be to remove the can opener from under the counter and Freecycle it. Maybe it will help someone else out.
A few days ago, the weather cooled off to the point that I could shut off the air conditioning. Woo-hoo! I'm hoping to keep it off as long as possible and not turn the furnace on until at least November 1st (it runs on natural gas, but we are billed for both, so keeping both down is a priority).
This week I will be devising ways to keep our bill lower this winter. This time of year, it is reasonably low, so long as neither the AC nor the furnace are running. I am doing this now because if there is an upfront investment, I will need to save for it and I want a few weeks to plan what we can do so I don't dump a great big honey-do list in Hubby's lap. He hates that! I can do it a little at a time and he won't be quite so annoyed! :)
A little video, because I can't get that song out of my head!
Tuesday, September 6, 2011
Water consumption update
After a couple of exceptionally busy weeks, I think I'm back--for real. It has just been crazy around my house and I've been running around like a crazy woman during naptime. This is really my only time to blog, so if I fill up my time with cleaning, laundry or patting little one's backs so they drift off to sleep, then that leaves little blogging time.
Last week I posted about a decrease in our income and how I was going to work to reduce water consumption. I did do a few things and have implemented others. First off, I filled a couple of 2 liter bottles and placed them in the toilet tanks. The bottle displaced quite a bit of water and will now use less with each flush. Along with that we are employing the "let it mellow" technique and simply do not flush unless it's necessary. Please note (in case my daycare licensing rep. is reading) that I'm not doing this in the daycare area, only our family living quarters. Although, I will say that it does happen occasionally anyway if I'm not standing over each child making sure that they remember to flush. Such is life I guess.
Other areas where I'm trying to make sure to get the most bang for my water buck...
- Use the water that I fill the cooler with when making yogurt to water the pepper plants on the deck.
- Make sure the dishwasher and washing machine are full to capacity when running a load.
- When hand washing pots and pans, I start with soapy water in the smallest pot and after washing, dump the soapy water into the next size pot and rinse the first pot over the second so I collect that water. Continue as needed.
- Take short showers (challenging with the girls-they love to take long, hot showers)
- When brushing teeth, fill a small drinking cup about half full of water. Dip toothbrush before brushing, and pour a bit on the toothbrush if needed. Use the remaining water to rinse mouth and get a drink if needed. The hope is that the kids can self regulate the amount of water they need to do their teeth. If found that unless I was standing over them, they still let quite a bit of water run down the drain just trying to turn the knob off.
- use grey water from washing machine and shower to flush the toilet or water garden (hoping to plant some fall veggies).
- get a rain barrel going for things like washing the car or watering the lawn-although I think the season for that is over for the year. If we could get it up and going by next summer, that would save us quite a bit of water I think.
Wednesday, August 31, 2011
Week 34: Water Use

I am coming up empty on quite a few things. All of the usual places to cut back, we already have. There's no cable, our cell phones are bare bones and our internet/phone is as cheap as it can go This leaves utilities. I don't believe our water consumption is out of control, but I'm sure there are ways to conserve. Water conservation is both green and good for my wallet (at least that's the plan).
This week I'll be reasearching ways to save water and see what strategies we can put in place to lower our water use. I think I'll also call our local water district and see what average use is in our area and see how the bill is calculated. I'm particularly interested in how the sewer rate is figured. I think the amount we pay for sewer seems excessive (we'll see).
Subscribe to:
Posts (Atom)